Thrift Find: Eames-era Lounge Chair DIY Upholstery
Happy Saturday to you all! Thought I’d share a recent project (just completed yesterday!) with you real quick. To spare yourself all the how-to details, feel free to scroll down to the end to see the after photo!
Reupholstering this Eames style lounge chair and matching ottoman has been on my to-do list for a while. You may remember that I found it at the Habitat ReStore last year. A real steal at $20! These type of chairs are almost as easy as dining chairs to reupholster so I took a number of photos so you can see the process (in case you thrift a similar chair that just needs new fabric). The only parts that require much effort are the arms, piping (which I opted out of due to being short on fabric), and button making. But those steps are pretty easy as well.
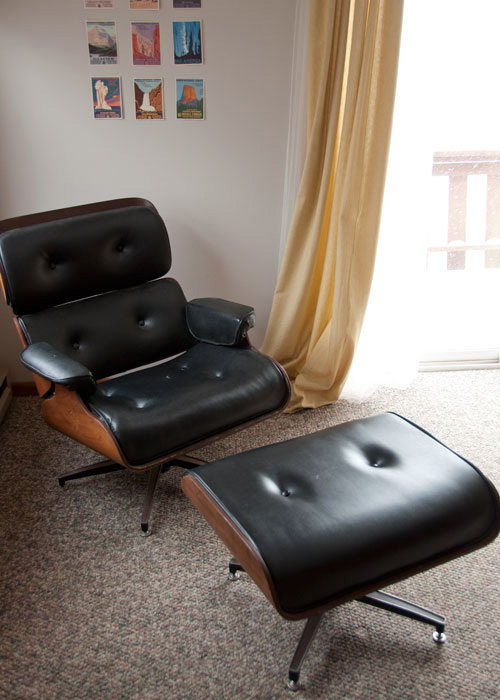
Here is my chair before the redo. It looks decent in photos but it was done in a slick, cold vinyl. The real-deal Eames chairs would have been leather. Other things you might not see in the photo: a small gash in the seat and poorly replaced buttons. They were very shabbily covered in electrical tape. Yes, electrical tape. Might have been ingenious except for how badly it was stuck on.
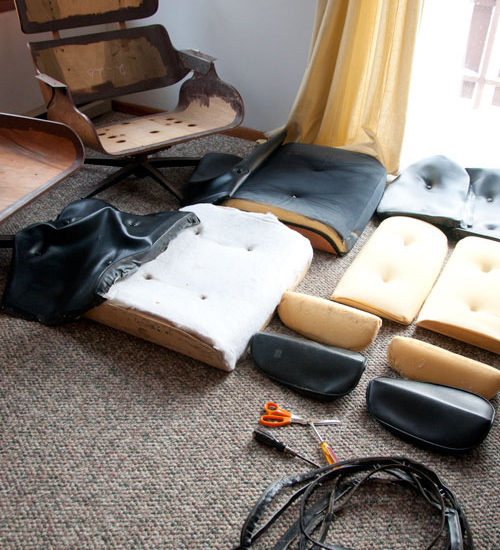
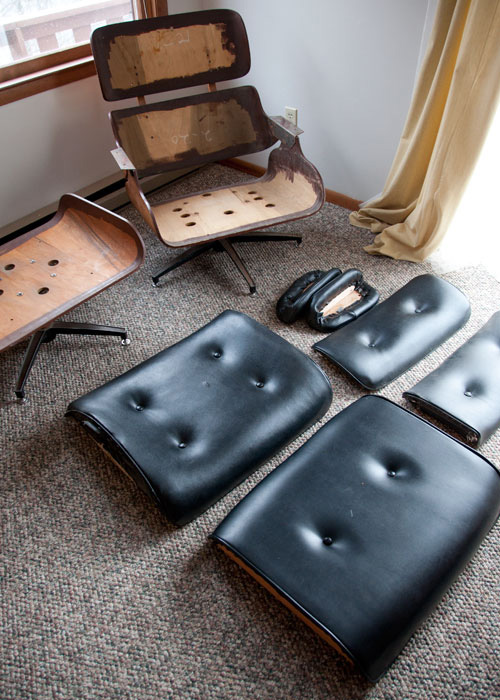
It is a quick job to disassemble this style chair. Just unscrew all the pieces and you’ll be left with this (photo below). At this point I stopped to rub some teak oil on the wood to give it more life and luster.
Next, pull off the piping which is stapled around the edges of everything but the arms. Finally, snip off the buttons so that you can release the main fabric from the wood backing and pry off the fabric itself. I used a special forked upholstery tool for this but you can use a small flat head screwdriver to get under the staples. This part always makes me squeemish…the amount of dirt and grime even on a vinyl chair is pretty disgusting. Once finished, you’ll be left with this:
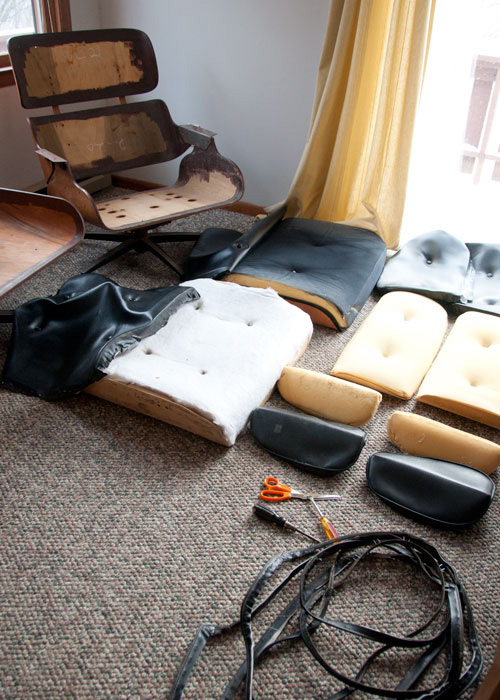
My foam was in pretty good shape so I opted to reuse it rather than replace (no idea why the ottoman foam was sprayed black but it was still fine otherwise). I then used the old pieces of vinyl as a pattern to cut the new fabric pieces. I didn’t take photos of this. Just lay your old fabric on top of the new. I cut out everything but the arms saving that step for later. Your new pieces of fabric don’t need to be exact. Just cut rectangles about the size of the old vinyl erring on the side of too large as you can always trim later. Lay the fabric with right side down and put your first chair piece on top. Like this:
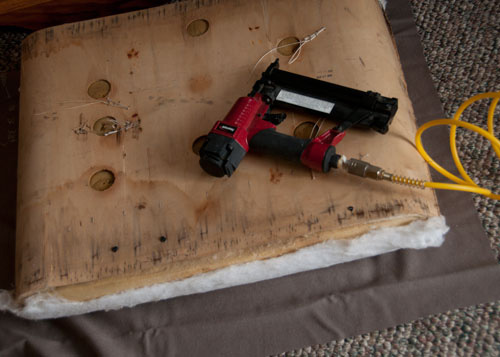
Now comes the fun, productive part. Staple your fabric on each piece like you are stretching a canvas. I needed two hands so could not photograph this part but basically you’ll staple the middle of each side, pulling it fairly taut as you go. If your fabric as any stretch to it, plan to pull more tautly than a fabric with no stretch. You don’t want it baggy when you sit and put weight on it. Pull nice and taut but not so much that you are really compressing the foam. And remember not to staple fabric over any screw holes. You’ll need access to those in order to put your chair back together later (I learned the hard way).
Once you have a staple in the middle of each edge, pick one edge to continue on. Starting from the middle (where you already have one staple) continue stapling towards the corners of that edge. Watch that you are keeping the fabric square as you go. I like to stop a few inches from each corner and do the corners last. Staple the other three edges remembering to pull and keep fabric square at the same time. Finally, for the corners just go slow and pull the fabric taut so that the gathers are only on the back and you don’t have any puckered/gathered fabric that will show on the side or front. If you do just 1/2 inch at a time you should be able to keep the fabric completely smooth where it will be seen once the chair is put back together. You’ll, of course, have gathers on the bottom by the staples but those will be hidden.
Once you’ve done the seat, ottoman and back rests you’ll have something like this photo below. You can see I was trying to visualize what contrasting black buttons would look like. Nice, though I ultimately decided on the same fabric as the chair.
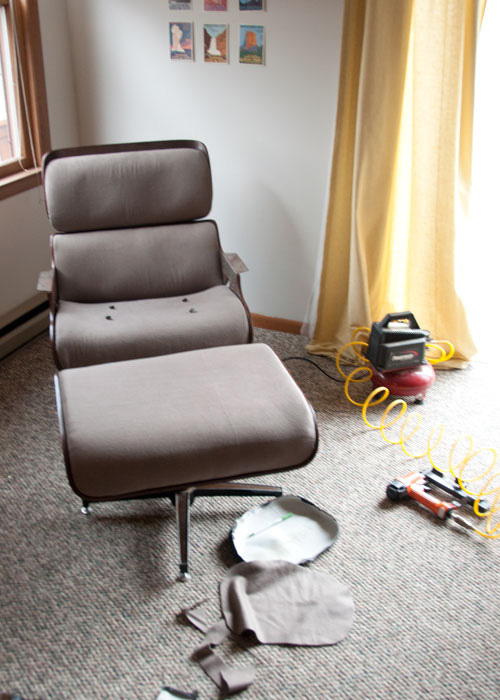
Next up! The arms. The arms are the only part that required sewing since I opted against piping. Piping is actually very easy so don’t feel like you have to leave it off. I was using a small $3 remnant of fabric and there wasn’t enough for piping. I think it looks fine without. By the way, I recommend about 3 yards of fabric for the job (including piping).
The arms look more complicated than they actually are. Take apart the old arms and, if your chair is like mine, you’ll find that it is just a oval piece and a 3-4″ strip sewn together. Use the old pieces as a pattern and cut out your new fabric. Here is what I ended up with:
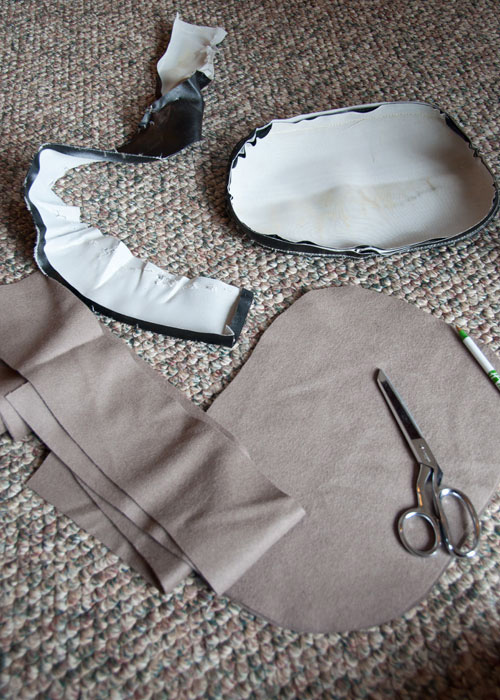
My pieces look bigger than the original vinyl in this photo but it is just foreshortening caused by my camera lens. Cut them as close in size as possible. The last thing you want is to have baggy arm or for the seams not to match up with the edges of your arm. My fabric has a bit of stretch to it so I cut just slightly smaller knowing that I could pull it taut as needed. First sew the strips into the same size loop as the original fabric. And then sew that loop to the oval…if you are doing piping, you’d stick the piping in while sewing this seam. I hardly ever use pins but I do recommend pinning with this seam.
Stapling the arm fabric onto the wood arm probably took me the longest of any part of the chair. I took my time to try to line up the seams with the arms edges and pulling to create as smooth a finish as possible.
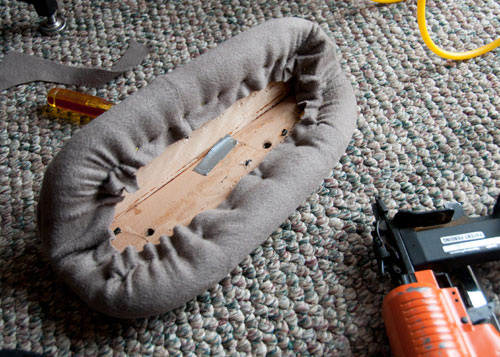
The only part where I could not avoid gathers showing was the fabric on the very front edge. You’ll notice the original upholstery job had gathers here as well. If I had thought to sew a dart there to remove some of the fabric, it would have laid smoother. You might want to try that to make it look as professional-looking as possible. Or maybe just fold one dart in rather than gathering like I did. Photo above is the backside of one of my arms after it was all stapled. The upper right edge in the photo above is the area with some gathering that shows on the final chair. You can also see it on the front edge of the photo below. Otherwise it wasn’t hard to keep the fabric smooth around the rest of the arm. I just laid the pieces on the chair for this photo. You don’t want to screw it together yet as you need access to put the buttons on.
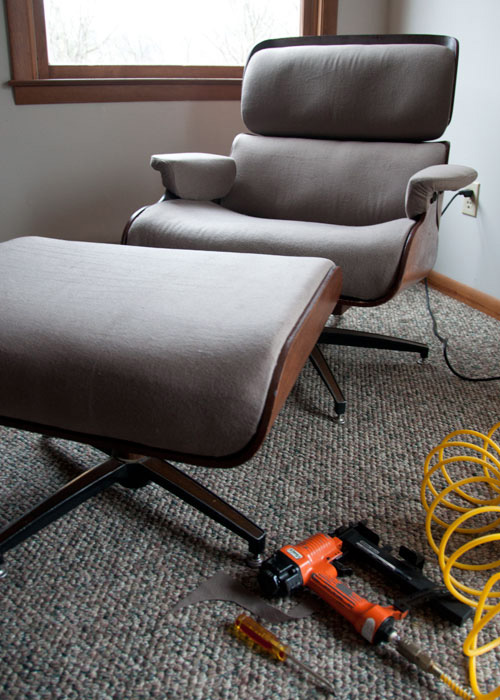
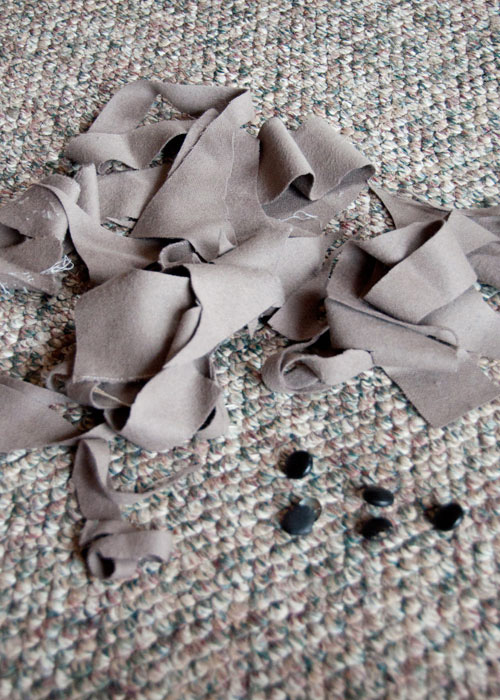
Finally, all we need are buttons! I only had miniscule amounts of fabric left. This photo below is every bit of my scraps. Thankfully, more than enough for 10 buttons plus a few extra in case a button or two ever needs replacing.
I’m the happy owner of an industrial button-maker thanks to my mother. She upholstered furniture much of her life and recently gave me a lot of her equipment and supplies when she stopped working.
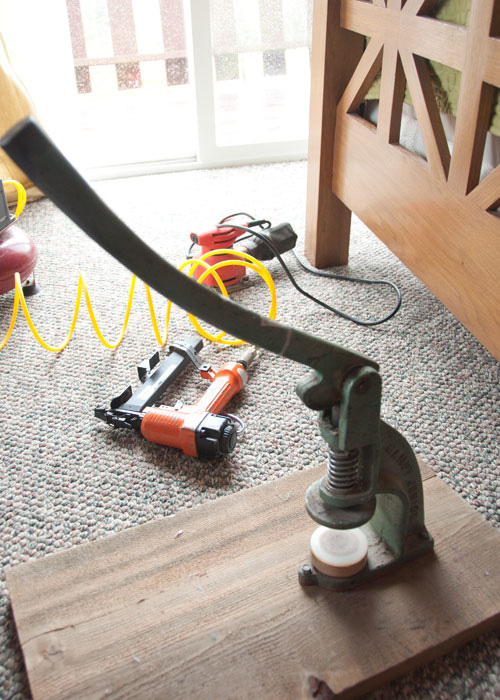
Basically, it cuts the fabric into circles with a die (photos below) and then you place the button pieces and fabric into special steel cases and use the press to smash the front of the button and the shank together to form the button. I have photos of the smashing step but didn’t want to bore you the details…comment if you’d like me to add them.
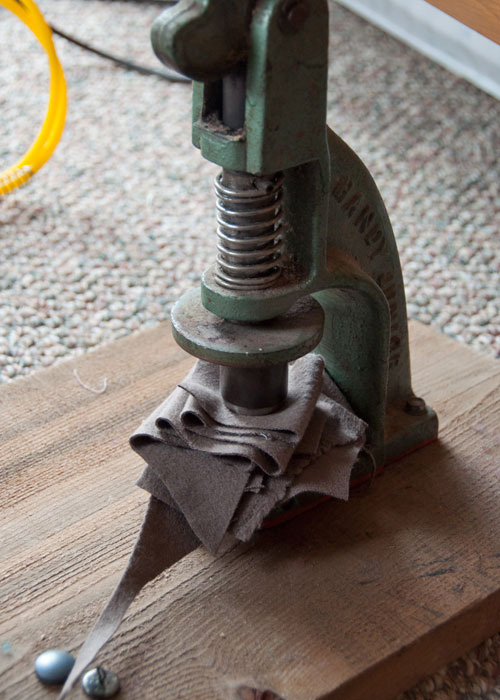
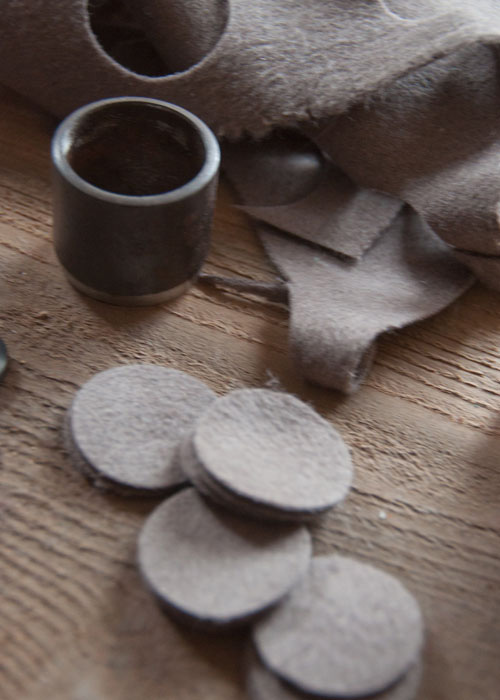

Pretty slick, huh? The average DIYer probably doesn’t have a button maker but I imagine you could take your fabric to an upholstery shop and they’d make your buttons inexpensively. I don’t recommend the button making kits you can buy at fabric stores. Those work ok for clothing but would not hold up well for furniture. Or be easy to use with upholstery weight fabric.
Use thick string and a long needle to tie on your buttons. Be sure to place them evenly and pull at the same tautness level.
Then screw your chair back together!
Final drum roll….
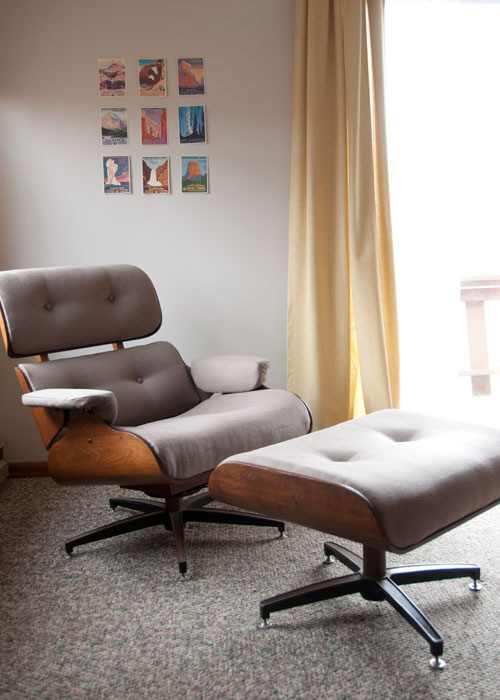
The only things I see that I’d work on harder next time are those gathers at the arms which I mentioned earlier and I’d have pulled the seat fabric a little more taut. See it puckering a little at the bottom left? But otherwise, not too bad for being 7 months pregnant and waddling around with a staple gun. I’m pretty happy. And for $23 I really can’t complain. We’ve placed it in the corner of our master bedroom and it will be a great chair for the many night-time feedings over the next year. It rocks smoothly, is nice and wide, and lays back far enough that I’m pretty sure I could even sleep in it. Looking forward to holding a wee one in this very spot soon!
Hope you have both a productive and a restful weekend!
Warmly,


